My project goal:
The goal of project ‘AstroNav’ was to challenge myself with something I didn’t know much about yet. I wanted a fully 3D-printed, lightweight but strong rocket that would actually fly.
These were the requirements:
- Lightweight
- Reusable
- Safe
- Cool looking
- Smart
First Steps
I began with a simple model rocket kit I bought. I assembled and launched it together with my grandpa, and we both loved it! After that, my interest in rockets and space kept growing, so I decided to start project ‘AstroNav’. The first rocket (Picture 1) was a failure. It was impractical to assemble, too heavy, and as a result, it flew very low and fell to the ground, breaking some fins.

Big steps
After that, I learned it was going to take more than 30 minutes of CAD designing and glue. I completely redesigned the rocket. Features that worked as intended, such as the parachute holder and the engine holder, remained in the current design.
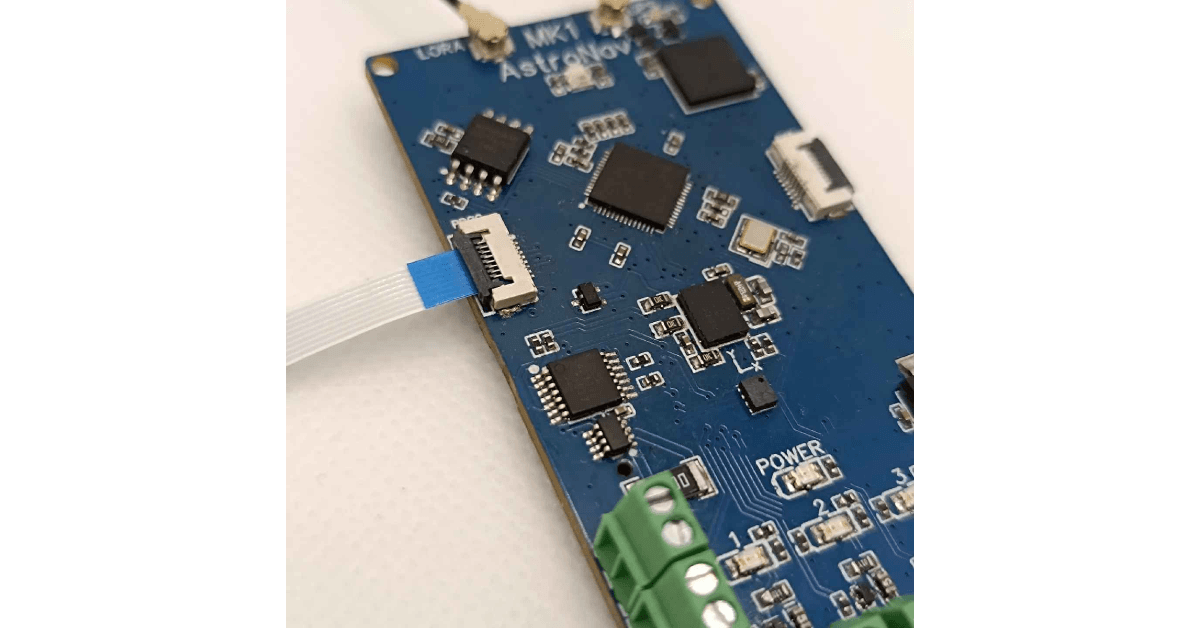
I also decided to challenge myself even further by creating a custom flight controller for the rocket. The custom PCB will be made from scratch. The goal of the flight controller is to receive live data from the rocket during flight and GPS coordinates to locate the rocket after it has landed.
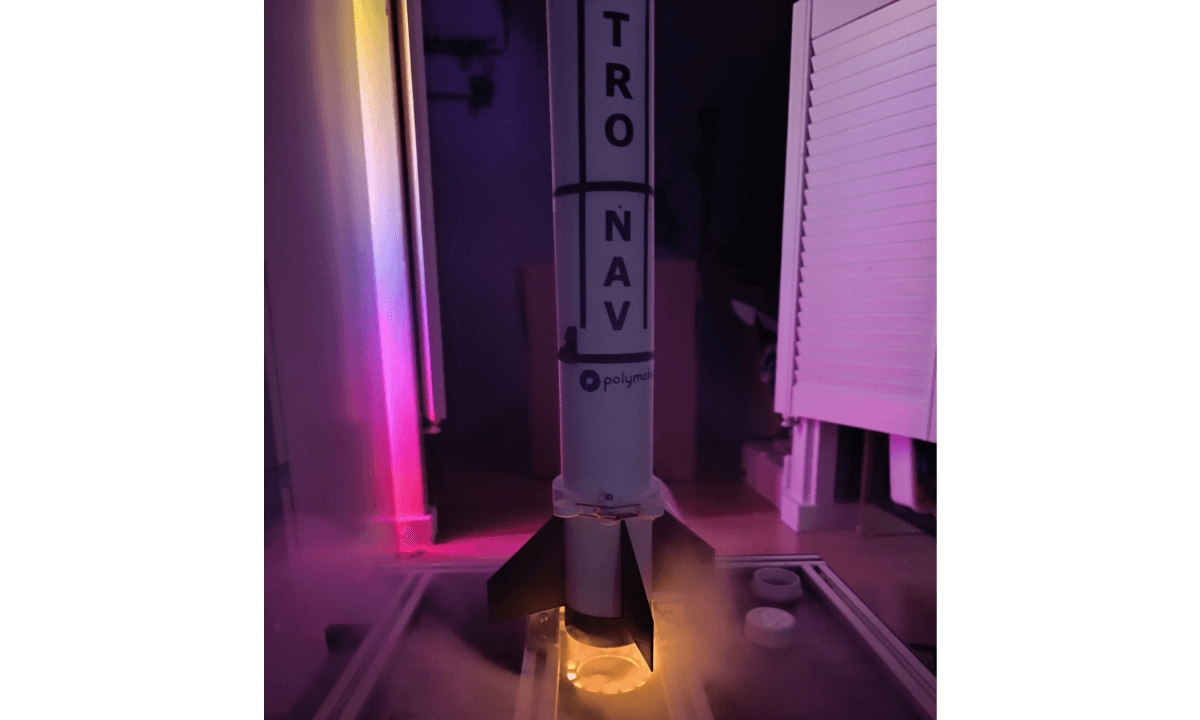
I also reached out to PolyMaker® to see if they were interested in sponsoring my project. They produce very high-quality 3D printer filaments, and the entire rocket is made from their awesome filaments! (They’re awesome—give them a try!)
I also made a YouTube video showcasing the launch of the rocket. In the video, I also share more details about the rocket itself and its backstory. Check it out if you’d like to see some epic footage!
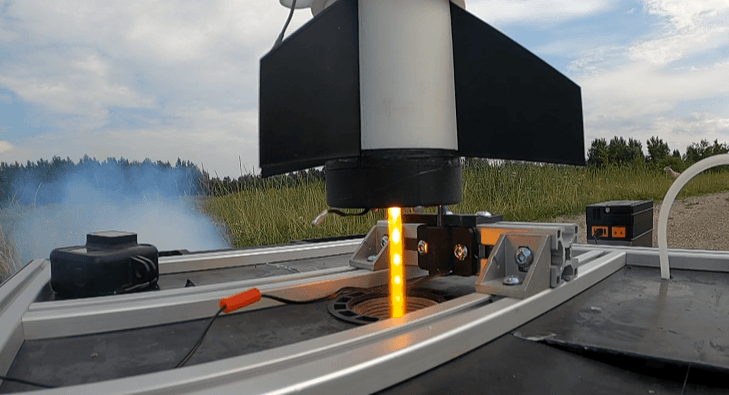
Great succes
I am happy to say that this launch was a success! However, it was not perfect, and there is still a lot of room for improvement. There are two issues that must be fixed before the next flight.
The first is the onboard camera. It failed during the first flight and, unfortunately, also failed this time. I believe the cause is vibrations corrupting the micro SD card.
The second issue is the flight controller, which was unable to launch the rocket. I was still using design V2, which is now very outdated. It was nerve-wracking to use because it launched the rocket on a fixed timer. Once powered on, I had six minutes to close everything up and move to safety. Looking back, I’m not proud of this setup—it was very, very unsafe!
Additionally, the PCB refused to ignite the E-Match. This was likely due to the chip on the PCB that converts power from 7.2V to 5V overheating. This may have happened because I directly soldered the camera to the chip… oops.
Do you want to print your own AstroNav Rocket? Now you can!!!!
Link: https://www.thingiverse.com/thing:6974252